Pages

Thursday, April 28, 2016

Nostalgia in Reverse

 
I just had to get in on some of the Helen Backhouse's HelensBatCave
wonderful polymer clay pieces. She does exquisite painting on lightweight polymer clay from molds  ( moulds where she comes from) that she creates from shells, leaves, pods and flowers. Let me tell you these are hot items!

I squirreled away some of the raw ruby nuggets that I picked up at the Tucson Gem and Mineral show and even kept a couple of my "kerfuffle" lampwork discs and wired them up with some tiny bone vertebrae and finishing off with my favorite  Lucy Haslam  FaeryStones earwires

 I must add that Helen leaves it to to you  for the placement of the holes. I was able to use my small punch for my holes.

Long yet lightweight. Colorful and springlike

I wish you all a happy spring. I am on my yearly northward journey to Alaska to experience springtime all over again.

Thanks for looking!
Kimberly Rogers 


Wednesday, April 27, 2016

Nothing Ventured- Nothing Gained

Do you ever get the urge to go out on a limb and try something new? Oh if only I had a torch!!! I can only imagine the possibilities at my finger tips.  Unfortunately my living space does not accommodate this venture, but someday I hope.  Nevertheless, I fall back on what I can do, and that's paint.  I was trying to come up with a cool finish on the surface of metal.  Really loving the crackled look, I Googled how to achieve this.  Turns out you can do it with Elmer's glue, dang...that sounds easy!!  Doesn't it???

I applied enamel paint over the surface of copper, adding two different colors, one over the other.  After drying, I applied crackling gel, ( I did not use Elmer's this first go around).  The results were not as I expected so I tried to sand it off thinking I could start from scratch- NOT!!
As you can see, this removed the shiny crackle and brought out both colors of the paint as I sanded through the finish deeper. I kept going until I reached an affect I was okay with.  


They were looking a little plain, so I jazzed them up with a strip of stamped copper and some tiny copper rounds.


Not quite sure how these were going to be perceived in my shop, but I thought what the heck. Nothing ventured, nothing Gained, right?.  To my surprise they both sold right away ☺


Thanks for taking a peek and would love to hear which finish resonates with you most. 
Bye for now!  Lynn

My ETSY Shop


Tuesday, April 26, 2016

A Night Out _ Chandelier Earrings

I see these being worn on a night out. Something special, and fun. They have a bit of swing and a lot of sparkle. Created with thick sterling silver disks, mill rolled for an embossed texture. I went with Swarovski crystals for this set because I absolutely adore this blue color _ Pacific Opal. And for sparkle Swarovski's can't be matched, IMO. I think the pale blue looks fabulous next to the matte rustic finished silver. Although, I'll probably put them in the tumbler for strength... and end up sanding them again for that matte look!

What do you prefer... Shiny or matte brushed silver? 


http://www.artandsouljewelry.com/


Monday, April 25, 2016

Not quite ready yet

Whenever I hit a designer block I turn back to my old passion: bead embroidery. It gives me more creative freedom, as I can place these tiny little bead treasures anywhere I like. If you haven’t done bead embroidery yet, I urge you to give it a try. There are beautiful guidebooks on the market to teach you the basics.

Bead embroidery basically comes down to gluing and sewing beads and components on a foundation and backing it with another material. I prefer Lacy’s Stiff Stuff as foundation as it is firm, easy to sew through and it will not fray. With a marker I make it a bit darker so the white will not shine through the beads. For components you can use anything you like as long as it has more or less a flat back. Here I used beautiful pewter charms from Inviciti, polymer clay headpins from Studio St James, amethyst cabochons and Lucite flowers. I glued these on the foundation with 2-part epoxy. 

Then out come the little guys: seed beads. Just sew them on the foundation in a pattern you like. You can bezel a cabochon with seed beads, using peyote stitch. You simply cannot go wrong with these little treasures.

I have to apologize, as these earrings are still a work in progress. I managed to finish just one half of the pair yesterday; the other one is still in the first phase. The ready one is also a bit a work in progress as I’m not completely satisfied. So I will fiddle and twiddle with it a bit more before I will post them on Etsy.

Thank you for looking and have I hope you give bead embroidery a try.

Janine
Esfera Jewelry

Friday, April 22, 2016

Weathered Wild Flowers

My hubby and I can't resist snapping pictures everywhere we go. Thankfully, in this digital age, it's easy to take and store a ton of images almost effortlessly. I love having this huge pool of images to inspire me, and remind me of the places we've visited together throughout the years.

My inspiration this week is a picture taken by my love, as we strolled through a field of wildflowers at sunset in the Peace River region, Northern British-Columbia, Canada:

Northern Wildflowers at Sunset by "Mr. Nathalie" :)

I just love the colors, and that sense of freedom and peace I feel when I look at that photograph.
These flowers have been there for a long time, wild and free, sun-kissed and happy.

https://www.etsy.com/shop/MyGardenOfLove?ref=l2-shopheader-name

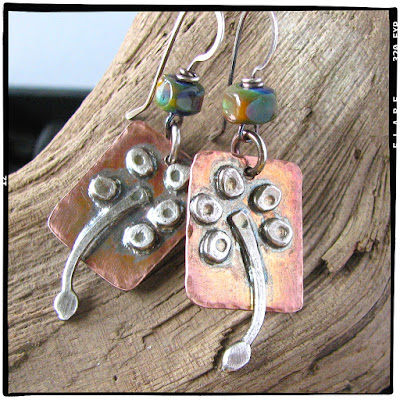
I used both copper and sterling silver in making these wild flowers earrings.
Softly weathered, definitely wild and rustic.

https://www.etsy.com/shop/MyGardenOfLove?ref=l2-shopheader-name

 Topped with small handmade multicolored artisan glass beads from Little Crow,
which capture a variety of colors that we found during our sunset walk in the forest.

https://www.etsy.com/shop/MyGardenOfLove?ref=l2-shopheader-name

The antique patina creating shadows, and the satin texture on the petals softly catching the sunlight.

Thank you for stopping by! Enjoy your weekend!

... and believe in your dreams... 

Nathalie Lesage


Thursday, April 21, 2016

Sunny Day Celebration

Its a totally gorgeous spring day as I write this. The high today is predicted to be 79 F and it is a very pleasant 77 F right now.  We've eaten dinner "al fresco" the past two evenings and will do so again tonight. Our rhododendrons are blooming and we have sweet smelling bouquets of lilacs in the house.  Perfect in every way!
This bright, happy weather is infusing my jewelry designs, as well.  I bought some gorgeous lampwork headpins from Sue Beads last week and couldn't wait to use them!
I accented the yellow dots and orange stripes by pairing the headpins with yellow and orange ceramic beads.  These beads were made by a local ceramicist who (unfortunately) no longer makes beads.  We both used to have work at Gallery One in Ellensburg, WA.  I bought up several handfuls of her beads and have been hoarding them for about 15 years!  The slip trailing (raised designs) on these beads is so detailed and exquisite. You can see why I've treasured them!
However, the time has come to use these beads and Sue's beautiful glass headpins were calling out! The minute I slipped the orange and yellow ceramic bead on Sue's headpins, I could see that it was a match made in heaven.
I kept the earring design simple, because I felt that there was enough going on with intense colors and the patterns.  A couple of brass bead caps was all they needed for a finishing touch.
My new headpins and the sunny day were all I needed for inspiration.  Wishing you sunny days, too.
The Sunny Day Earrings are available in my shop, which, by the way, is undergoing a face lift.  Hope you like the new look.

Wednesday, April 20, 2016

Take It Eeeeeeasy

Ever feel like you're taking a cop-out easy route with one of your designs? But you really don't care because the end result turns out so perfectly that you wouldn't change a thing? 
 
I had some of that guilt when I made this pair a couple weeks ago featuring some more of Kimberly Rogers' deliciously mismatched lampwork glass headpins. The glass itself is a very soothing, neutral, streaky birch color---I've been gravitating more and more toward neutrals and earth tones over the past year. I wanted to highlight the fact that Kim deliberately made one headpin twirled like a horn and left the other drippy. What better way to do that than to make one of my soldered caps twirled and the other smooth? And the "I feel so clever" moment: I switched up the swirls. Oooooo, gettin' tricky!


Ok, so it's not a complex design. I could have hung these headpins beneath stacks of grungy precious bits, like I'm wont to do. I could have hung them from gnarly hoops or used them as focals in a chandelier-style pair. But lately I've been craving stated simplicity. 

To be honest, it's almost more difficult to reign yourself in when designing. At least for me, anyways. Plus, I always try to be sensitive to the wearability of pieces. It's one thing to create a masterpiece for a gallery or a competition, but it's another thing to make pieces that people are able to wear and love every day of their lives. That's the miraculous thing about creating art---every artist has unique goals for their work. There's never a wrong or a right answer. It just is. And that's a beautiful thing. 

Happy Wednesday!
Nikki
LoveRoot on Etsy

Monday, April 18, 2016

Almost Heaven Headpins

Can't tell you why the name of the headpins, but it just kept popping into my mind so that is what they came to be! I don't often name components - or even designs for that matter. But I love them! Created by our own Kimberly Rogers of Numinosity and Numinosity Beads

I have had a love/hate relationship with artisan headpins for a long time, so I have been buying them and encouraging myself to use them. I was  pleased with these.
Awesome Headpins

I want to share with you how I wrapped these. I have never done this before but it worked the way I'd hoped it would, although there was a little bit of chaos along the way.

First I made a charm out of the headpins, leaving some of the wire and wrapping it loosely with the remainder of the headpin wire. 

I prefer 20-gauge wire for this kind of wrapping, but the natural Turquoise nuggets wouldn't take it. 22 would be a little wimpy for the lower wrap so I decided to use two strands, one of each. But the 20 gauge could only go as far as the ceramic disk. So after putting the two wires through the loop of the charm, I bundled all four pieces together and crimped them with the chain nose pliers, then used one of the 20-gauge strands to do most of the wrapping below the disk. I then put the disk on the 3 strands that were left. I took the remaining 20-gauge strand and one 22-gauge strand and brought them down as a wrap over the edge of the disk and wrapped both around the "neck" of the earring. I finished off the top in the normal fashion on the one remaining 22-gauge wire, hardening it as best I could. Then went back down to the two wires that came over the disk, made sure their wrapping was snug, cut the 22 wire and finished off the bottom wrapping with the remaining 20 gauge. Whew!

You can find these earrings here
The remainder of the components are handcrafted ceramic disks made by Nadia Karapencheva of NadiaTerra, natural Turquoise nuggets, handcrafted bronze beads by Anna Chernykh of AnnaBronze, Strawberry Quartz with speckles of Pyrite. Plenty of deeply oxidized copper wire, and Black Niobium Ear Wires. 

Thank you for stopping by today. Have a Happy Tuesday! I'll be back on May 3rd. Hope to see you then. The most wonderful Nikki Zehler will be here tomorrow. :o)

Norbel
She Flies Again - Etsy Shop

Spring in my ears

These earrings are to celebrate spring and everything lovely that is going on in nature at this time. 


Ingredients:
Handmade red lace flowers on ceramic - DonnaPerlinplim
Oxidized sterling silver handmade earring hooks
Wood twig beads
Vinyl disks
Messy wrapped oxidized copper wire


All my best,
Malin de Koning


Thursday, April 14, 2016

We're All Ears :: April Reveal

There is something so magical in a spiral. It is one of the most ancient of spiritual symbols and is the universal pattern of growth. Spirals represent the feminine and fertility, symbolic of the energy of the life force. It is indicative of the journey of life that we are all on. They are magnetic and mysterious. It is one of my favorite shapes.


I am sure that our prehistoric ancestors were influenced by the the shapes they saw in the natural world and spirals are one that they would have surely noticed. Those in the unfurling ferns covering the forest floor would have inspired their ancient cave art.

For my earrings I envisioned a tumbling cascade of spirals all linking together with tiny crystal droplets, like drops of dew. I wanted to make them long, yet light; simple in material, yet complex in construction.

I started with the ear wires. I found a set of sterling silver wire hiding in my stash. As much as I tried to make them equal, each spiral has little differences, much like each individual plants on the forest floor. I simply created spirals mainly with my hands, adding a little loop to the bottom two. I interlocked the tiny spirals, adding a tiny moss green faceted teardrop to weight them and add a bit of flash, like tiny dew drops hugging tight to the spiral.

I call these Unfurling. Light, yet substantial. Simple, yet complex looking. Soft, yet bold. Perfect!


Faithful reader Sharon Piatek made something but was unable to post it and asked for my help. She was inspired to make a complete set with earrings and coordinating bracelet with the spiral theme.


Now it is your turn. Show off what you did inspired by the April inspiration.


Get the InLinkz code for your blog!


Briny Deep

Spiny oyster shell discs and some plum satiny donuts from Outwest
I like designing with double hole sticks in the case of this coral for a more horizontal design


It's always a challenge with wirework for me. Usually the first one is successful while the second one I have to futz with a lot to get it to look similar to the first.
I haven't had any training with wirework so it's all experimental for me. I'm sure there are a lot of tricks to solve simple problems.

These are quite lightweight and just a bit brighter than my  usual palette


Now have a great day and thanks for stopping by!
Kimberly Rogers
NuminosityBeads

Wednesday, April 13, 2016

Edgy Slices

I cannot tell you what a thrill it is to get your hands on the works of Kimberly Rogers at Numinosity Beads.  The only disappointment was the fact that I didn't order more, what the heck was I thinking!!!!  I could have sold these over and over again.  However, the slices did go like hotcakes, so I was lucky girl to get my hands on a few.


One of my favorite color combinations is blues and greens, so I felt that tiny tubes of turquoise were most appropriate followed with Ethiopian copper spacers.  These have a 2 hole connection at the top. A little bit more challenging in my opinion, so I went with some rusty rings to bring it all together.  Perfectly balanced, bursting and unique ♥


This second pair is also a HUGE favorite.  I adore the colors of rusts, oranges and burgundies. 

I call this my romantic~rustic look.

The glass discs are from Terry Turner of Silverish Designs.  Another impeccable artists who;s work is hard to get your hands on these days. They accent Kim's charms like a match made in heaven. I must say, these were hard to let go.  


Thanks for taking a peek friends, see you again in two weeks, Lynn Ferro


Tuesday, April 12, 2016

Raw Silver Post Stud Earrings

Feeling grateful for so many things today. For open windows with a cool breeze. Fresh air coming in. Tea this morning with a good friend. Laughs, smiles. My jewelry bench and tools. Being inspired. And also, for this blog. For all the sharing and inspiration.

Today's offering has been rattling in my head for days. I wanted to do some post dangles with small hoops and raw silver nuggets and this is what I came up with...
These earrings are .999 Fine Silver except for the posts and post nuts which are .925 Sterling Silver. 
This set is a nice light weight and I think they'll be great for everyday wear. I am very pleased with how they came out and plan on doing more in this style with gemstone dangles. Stay tuned..

Happy Spring! 
http://www.artandsouljewelry.com/


Monday, April 11, 2016

Chinese lanterns

Some months ago I found a wood burner for sale. With some vague ideas in mind what to do with it, I couldn’t resist and bought it. The vague idea was so vague that until this day I still don’t remember what it was. Never mind, yesterday I decided it was time to have some fun with it and start experimenting.
I still had some wooden beads (bought with a very vague idea what to do with them) and went to work. 
As you might know I live in a truck converted into a mobile home. Not much space to work. Especially not with a very hot wood burner. But I managed to burn some patterns in the beads, without setting our truck on fire (a whole lotta wood inside) and without burning patterns into my fingers. I wasn’t very satisfied with how they initially turned out. So out came the green patina. It looked better but still something was lacking. I dove in our cabinet and found a forgotten little box… with blue and red acryl paint in it (never used, bought with a very vague idea what to do with it). I added some dots to the beads, some red faux suede, old padre beads and voila… Chinese lanterns for in your ears.
What do you think? Should I continue experimenting with the wood burner? On beads of course.. not on something else. Well... perhaps.....I have a vague idea....

Thank you for looking!
I wish you all a wonderful week.
Janine

Esfera Jewelry


Friday, April 8, 2016

Blue Bells


Gorgeous Blue Flower Headpins from Lara Lutrick paired with cool Pyrite discs.
I strung little silver beads inside the disc which seemed like a simple task but it was not an easy!
But I'm glad I persisted and got them in there because I love the way they look.


I added some gorgeous little Glass Beads on top which match the flowers almost perfectly!
They hang about 2" from Handmade Hypoallergenic Niobium Earwires.


Kristi

Thursday, April 7, 2016

Vintage Green Bloom Earrings

In my last post I wrote about making beaded wire hoops above the earring dangles.  I'm still playing with that idea, as you can see in today's earrings.
The green flower drops are very unusual,  I've never seen anything like them before.  I bought them from a vintage bead vendor at Bead Fest last year.  They are flat on the back and have a little tab at the top, with a side to side hole through it.  The were quite expensive, but I'm pretty much hopeless when it comes to resisting really unique beads.
I topped the earrings with pretty pink lampwork beads from Paradise Beads.
While I'm not much of a pink color fan, I've always loved deep pink and bright green because it reminds me of camellias and their green leaves.
Camellia in our backyard.
The Camellia Earrings can be found in my shop.